Flood events are part of nature and California is not an exemption from all types of floods. Homeowners need to be eagle-eyed especially when it comes to their safety and protecting their homes and property. One simple and effective way to reduce flood water damage is by creating sandbags.
What are Sandbags
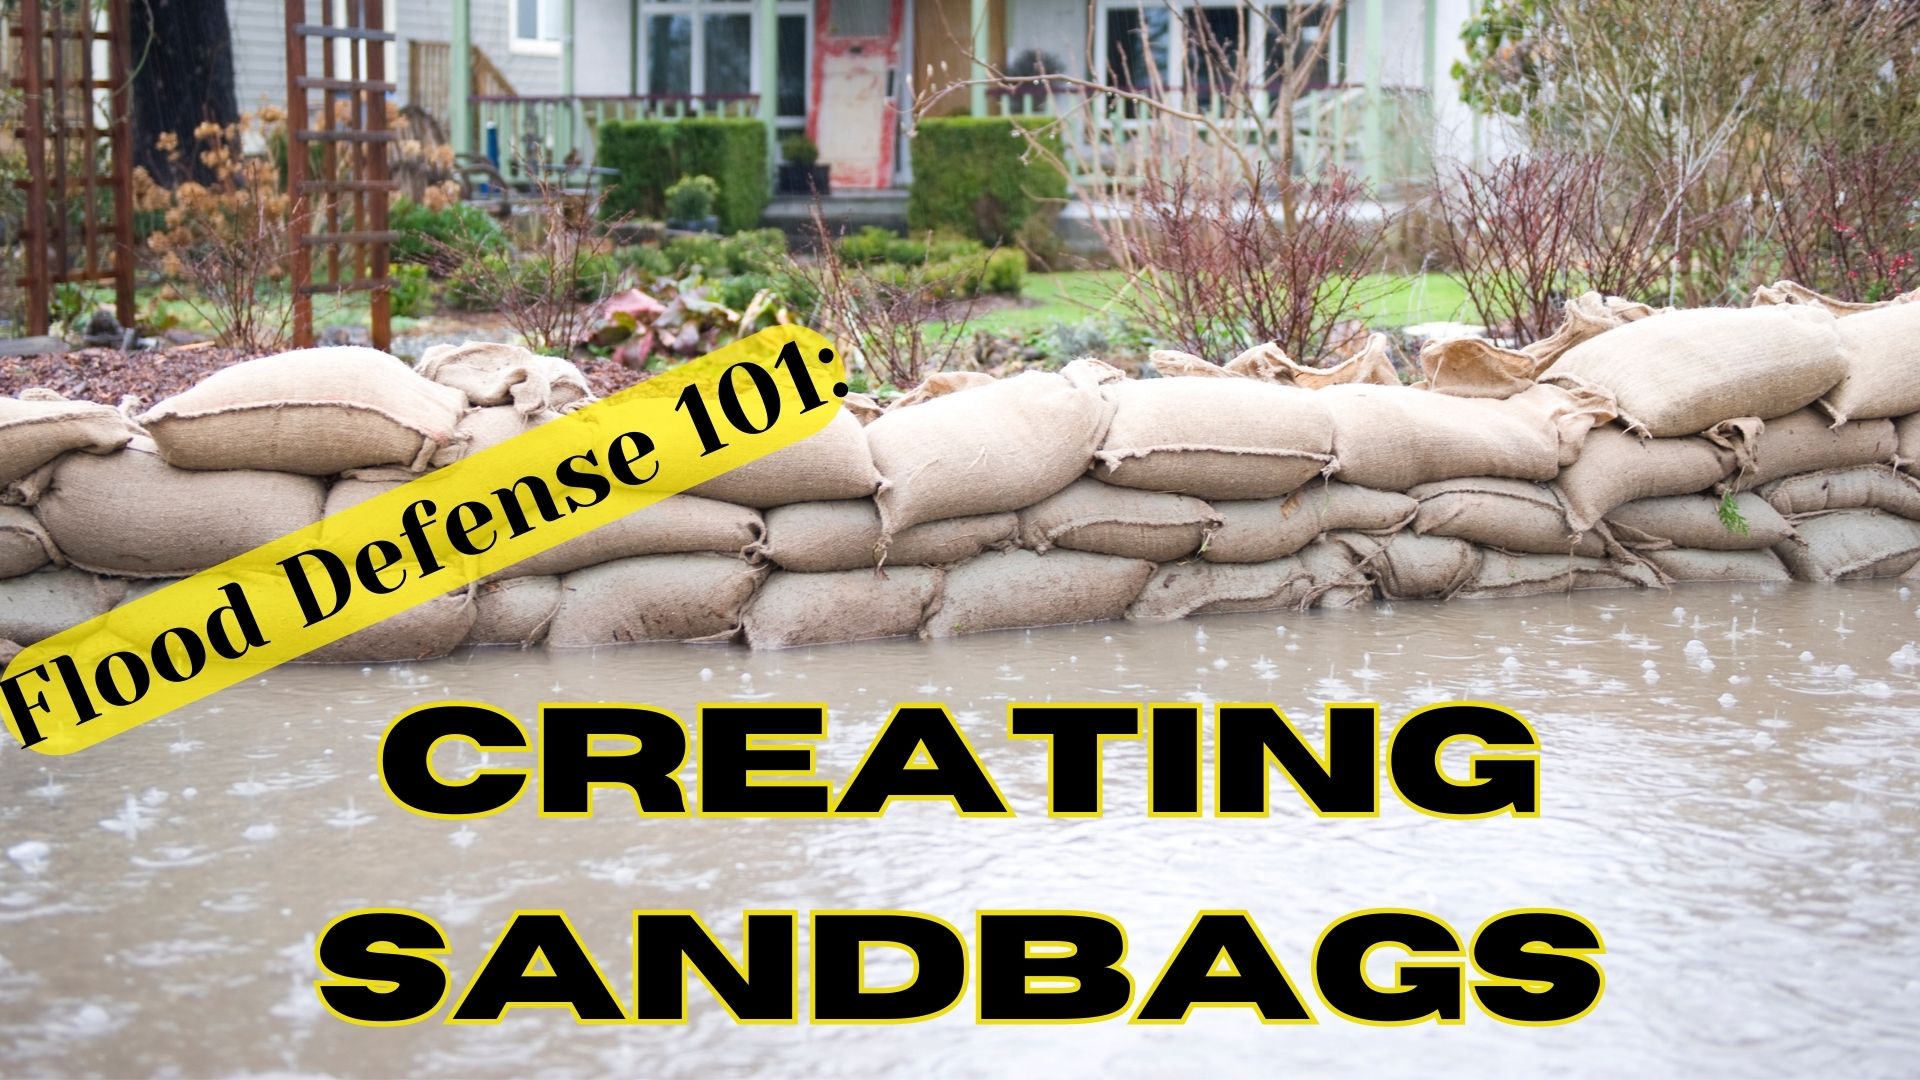
Sandbags are improvised barriers erected across a street or other thoroughfare using bags filled with sand to prevent or control floods. The construction of sandbags can still be used as the first line of defense against water damage.
Things to Consider in Making your own Sandbags
Some local authorities provide sandbags in an emergency but have limited supply so it’s still best to get or create your own sandbags. Homeowners need to be aware of the following in making homemade sandbags.
a.) According to the Army Corps of Engineers, the most commonly used bags are untreated burlap sacks available at feed or hardware stores. The polypropylene-made commercial plastic bags are also accessible from most bag suppliers.
b.) Two people should always work in pairs when filling sandbags. One person holds the bag between or slightly in front of widespread feet and arms extended. The other person carefully shovels in the fill material. The use of gloves and goggles is advisable and sometimes necessary.
c.) It will take about an hour to fill and place 100 sandbags for a 1×20 footwall.
d.) Make sure you have enough sand, burlap or plastic bags, shovels, and time to properly prepare.
How to Make the Bag
To make the bag, fold a 36-by-12-inch piece of heavy-duty material in half to make it 18 inches by 12 inches and sew three sides with a sewing machine.
1. Fill Materials
+ Sand is the most accessible material for filling and shaping sandbags. This also becomes heavier when drenched from rain or moisture.
+ Other materials such as silt, clay, gravel, or a mixture of these may be used in emergencies.
+ When vehicle access is cut off to the flood site, and you have no other choice, use the backside of the levee or an adjacent field to find whatever material is available to fill sandbags.
2. Proper Filling Procedure
+ Fold the opening of the bag outward about 1 to 1.5 inches to form a collar and held it open to allow the second person to fill it with material approximately one-half or two-thirds full, and then fold them over.
+ This will keep the bags from getting heavy and will permit them to be stacked with a good seal.
3. Proper placement
+ Remove any dross or debris from the areas where bags are to be placed.
+ Place the bags lengthwise and parallel to the direction of flow.
+ Fill the low spots first before placing bags the full length of the area.
+ Start at approximately one foot landward from the river or levee’s edge.
+ Fold the open end of the bag under the filled portion. The folded end of the bag should face upstream.
+ Place succeeding bags with the bottom of the bag tightly and partially overlapping the previous bag.
+ Offset adjacent rows or layers by one-half bag length to avoid continuous joints.
Advantages of Sandbags
Sandbags are easy to obtain and inexpensive and help in preventing or reducing flood water damage. Though they will not give a 100% assurance of a water-tight seal but stacking them correctly ensures that they will function as a flood barrier. They offer several advantages in flood management and mitigation.
- Firstly, they are cost-effective and readily available, making them a practical solution for communities to quickly respond to impending floods. They can be easily obtained and filled with sand or soil, requiring minimal resources.
- Secondly, sandbags provide flexibility in placement. They can be strategically positioned to create barriers around vulnerable areas such as doorways, windows, and low-lying entrances. This targeted placement helps to redirect floodwater away from critical infrastructure, homes, and valuable possessions, reducing potential damage and loss.
- Another advantage is their ability to adapt to various terrains and contours. Their malleability allows them to conform to uneven surfaces and effectively seal gaps, preventing water seepage and infiltration. This versatility makes sandbags suitable for protecting both urban and rural areas.
- Sandbags are also relatively easy to handle and install, making them accessible to a wide range of individuals, including community volunteers. They do not require specialized training or equipment, enabling quick mobilization and deployment during emergencies.
- Lastly, sandbags are a reusable flood management tool. Once the floodwaters recede, the sandbags can be emptied, stored, and reused in future flood events. This sustainability aspect reduces long-term costs and contributes to overall disaster preparedness.
In summary, the advantages of creating sandbags before a flood include their affordability, versatility in placement, adaptability to different terrains, ease of handling, and reusability, all of which contribute to effective flood protection and damage reduction
Flood Damage in Murrieta
If you are experiencing flood damage, call reliable restoration companies like Superior Restoration. Our water damage experts can deal with your flood-damaged properties. We offer 24/7 emergency services.